Quick answer
What is stamped concrete?
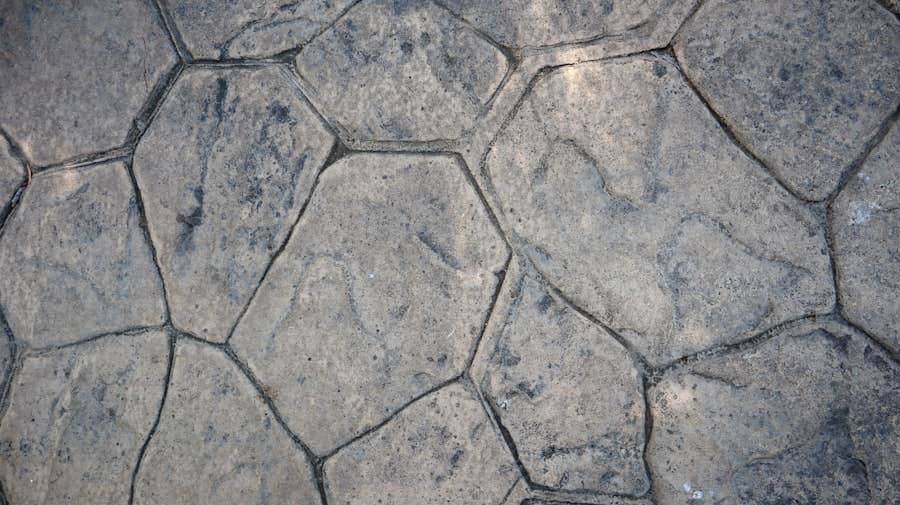
Stamped concrete is ordinary structural concrete that has been colored and then textured with patterned rubber mats while it is still plastic, producing a surface that reads as flagstone, slate, cobblestone, brick, or wood plank. It is a single monolithic slab — not individual units — which means it has the strength and low maintenance of concrete with the appearance of a paved or stone surface.
- Typical cost
- $16–$28 / sq ft
- Slab lifespan
- 30–50 years
- Resealing
- Every 2–3 years
- Stamping window
- Roughly 1–3 hours
Stamped concrete gets a mixed reputation, and both halves of it are earned. Done properly it's difficult to distinguish from natural stone at normal viewing distance, costs a fraction of what real flagstone would, and lasts as long as any other slab. Done badly it's immediately recognisable — repetitive, flat in color, with visible mat seams and a pattern that runs off the edge mid-stone.
The gap between those two outcomes is almost entirely about the crew, and specifically about timing. Everything that makes stamped concrete convincing happens in a window of a couple of hours, on a material that's actively hardening, with no opportunity to undo anything. That's why the quality spread is so much wider here than on any other concrete finish.
How stamped concrete is made
The process, step by step
The concrete underneath is the same slab we'd pour for any patio or driveway. Everything decorative happens in the hours after placement.
Base, forms, and reinforcement
Identical to any quality flatwork: compacted aggregate base, forms set to the finished level and fall, rebar tied and chaired to mid-depth.
- Stamping is a surface treatment. It doesn't reduce the need for a properly built slab underneath, and a stamped patio on a bad base fails exactly like a plain one.
Place and screed
Concrete placed, struck off level with the forms, and bull-floated to bring paste to the surface. Integral color, if used, is already in the mix from the plant.
Apply color hardener
A dry pigmented powder broadcast across the surface and floated in. As well as coloring, it densifies and hardens the top layer, which matters because that layer is about to take the stamp.
- Color hardener produces richer, more durable color than integral pigment alone, and most quality jobs use both — integral color as a base so any chip shows a similar tone underneath, hardener on top for depth.
Broadcast release agent
A powdered or liquid agent, usually in a contrasting tone, applied over the surface to stop the mats sticking. It also lodges in the low points of the texture, creating the secondary color variation that makes the result read as natural stone.
Stamp
Mats laid in sequence and tamped, working across the slab. This is the window that decides the result. Too early and the impression is too deep and the surface slumps; too late and the pattern is shallow and inconsistent.
- Good crews plan the layout first — where the pattern starts, how it meets each edge, where the seams between mat sets fall — rather than starting at one corner and hoping.
Detail by hand
Edges, corners, obstructions, and the joints between mat placements are worked by hand with touch-up tools. This is the step that separates a convincing job from an obvious one, and it's the step under time pressure at the end of a long day.
Cut control joints and cure
Joints cut into the slab within the first day, ideally following the pattern's grout lines so they disappear into it. Then the slab is kept damp while it gains strength.
Wash off and seal
Residual release agent washed off after the slab has set — how much is removed controls how much contrast remains. Sealer applied at 28 days, usually two coats, with a grit additive where traction matters.
Patterns and what they suit
Stamp mats come in a wide range of patterns, and the choice matters more for how the finished space reads than most people expect. The reliable principle is to match the pattern to the architecture rather than to a photograph you liked.
Common stamp patterns
| Pattern | Reads as | Suits |
|---|---|---|
| Ashlar slate | Rectangular cut stone laid in a regular pattern | The most versatile and most requested. Works with almost any house. Forgiving of edges because the pattern is rectilinear. |
| Random flagstone | Irregular natural stone | Traditional, craftsman, and rustic homes. The most natural-looking when done well, and the least forgiving because the irregular joints have to be hand-detailed at every edge. |
| Cobblestone / Belgian block | Small square set stone | Driveway aprons, borders, and traditional frontages. Strong texture, excellent traction, busy over large areas. |
| Running bond brick | Laid brick paving | Colonial and traditional homes, and matching existing brickwork. Alignment errors are very visible — this pattern punishes a careless layout. |
| Wood plank | Timber decking boards | Modern and transitional homes wanting a deck look without the maintenance. Effective, and heavily dependent on subtle multi-tone coloring to be convincing. |
| Large-format seamless texture | A textured stone surface with no pattern | Modern architecture, and areas where saw-cut joints will provide the geometry instead. Very forgiving to install; relies on color for interest. |
How color actually works
Convincing stamped concrete is never one color. Natural stone varies stone to stone and within each stone, and a single flat tone is the fastest way to make a slab look like stamped concrete rather than stone.
Three layers usually combine. Integral color is pigment batched through the whole mix at the plant — it doesn't wear off, and it means a chip reveals a similar tone rather than gray. Color hardener is a dry pigment worked into the surface, giving richer and more durable color than integral alone. Release agent, in a contrasting tone, catches in the texture's low points and provides the antique shading that makes the pattern read as depth rather than as an embossed pattern.
How much release agent is washed off afterward controls the final contrast, and it's a decision most homeowners don't know they're allowed to have an opinion on. Wash more and the result is subtler and more modern; wash less and it's more antiqued and traditional. Ask to see it at the wash-off stage if you can.
Stamped concrete vs. natural stone and pavers
The three options people usually weigh against each other for a decorative surface.
Stamped concrete
Pros
- A third to a half the cost of natural stone installed
- Monolithic — no joints to weed, no sand to top up, nothing to shift
- Faster to install: one pour rather than laying units
- Effectively unlimited pattern and color combinations
- Structurally a normal slab, so the same 30–50 year lifespan
Cons
- Repairs are visible — matching color and pattern on a patch is very difficult
- Requires resealing every 2–3 years to keep its appearance
- Quality depends heavily on crew experience
- Can be slippery when wet without a grit additive in the sealer
Verdict — The best value by a wide margin if the crew is genuinely experienced in decorative work. Ask to see their own completed jobs, not a supplier's photographs.
Natural stone
Pros
- Genuinely natural variation that no stamp fully replicates
- Individual pieces can be lifted and reset
- No color to fade or sealer to maintain for appearance
Cons
- Two to three times the installed cost
- Joints need maintenance and grow weeds
- Uneven surface — furniture rocks, and it's harder to walk on
- Still needs a properly built base underneath
Verdict — Worth it where the budget allows and the material itself is the point.
Interlocking pavers
Pros
- Individually replaceable — repairs are invisible
- Flexes with minor ground movement
- Usable immediately after installation
Cons
- 40–70% more than stamped concrete
- Joint sand needs topping up; weeds establish in joints
- Repetitive by nature — harder to make it look like anything but pavers
Verdict — The right call where invisible repairability genuinely matters or the ground is known to move.
How to judge a stamped concrete contractor
Because the outcome depends so heavily on execution, judging the contractor matters more here than on any other concrete job. A few things are genuinely diagnostic.
Ask to see their own completed work in person, ideally something three to five years old rather than freshly sealed. New stamped concrete almost always looks good; five-year-old stamped concrete shows whether the color was done properly and whether the joints were placed intelligently.
Look at the edges and the perimeter in their photographs. Edge detailing is where inexperience shows first — a pattern that runs off the slab mid-stone, or a smooth trowelled band around the perimeter where the mats couldn't reach, are both signs of a crew that stamps occasionally rather than routinely.
Ask how they'll handle the control joints. The good answer is that joints will be cut to follow the pattern's grout lines wherever possible, so they disappear. The bad answer is that they'll cut a standard grid across the pattern afterward, which leaves straight saw lines running through your flagstone.
And ask what sealer they use and whether it includes a grit additive. On any sloped or poolside surface the answer should be immediate and specific.
Questions to ask before hiring
0 of 10 checked
Stamped concrete questions
Related reading
Key takeaways
- Stamped concrete is a normal structural slab textured with patterned mats while it's still plastic.
- Everything decorative happens in a one to three hour window with no opportunity to undo it.
- Convincing color comes from three layers: integral color, color hardener, and release agent.
- Match the pattern to the architecture, not to a photograph — and always ask for a sample panel.
- Control joints should follow the pattern's grout lines so they disappear.
- Resealing every two to three years is not optional if you want it to keep looking the way it did.
Still deciding?
Ask us about your specific project
We'll give you a straight answer on the phone, including when that means telling you that you don't need the work you asked about. Free written estimates across San Jose & the greater Bay Area.